
How to encrypt a USB drive using macOS
Preparing the USB Drive
Bare in mind, that you will have to format the USB Drive, so if the drive has files on it, I would copy them to somewhere safe first. Starting with macOS High Sierra (10.13), Apple switched to the new HFS+ or Apple File System. Therefore, the encryption works with drives that feature GUID Partition Map only.
Connect a USB drive to your Mac
- Go to Applications -> Utilities -> Disk Utility. Tip: Open Spotlight search and type in Disk Utility”.
- In the Disk Utility toolbar, click the View button and select Show All Devices.
- Select your USB drive in the left panel under the heading External. Tip: Click on the heading to see the drop-down list of all active external devices.
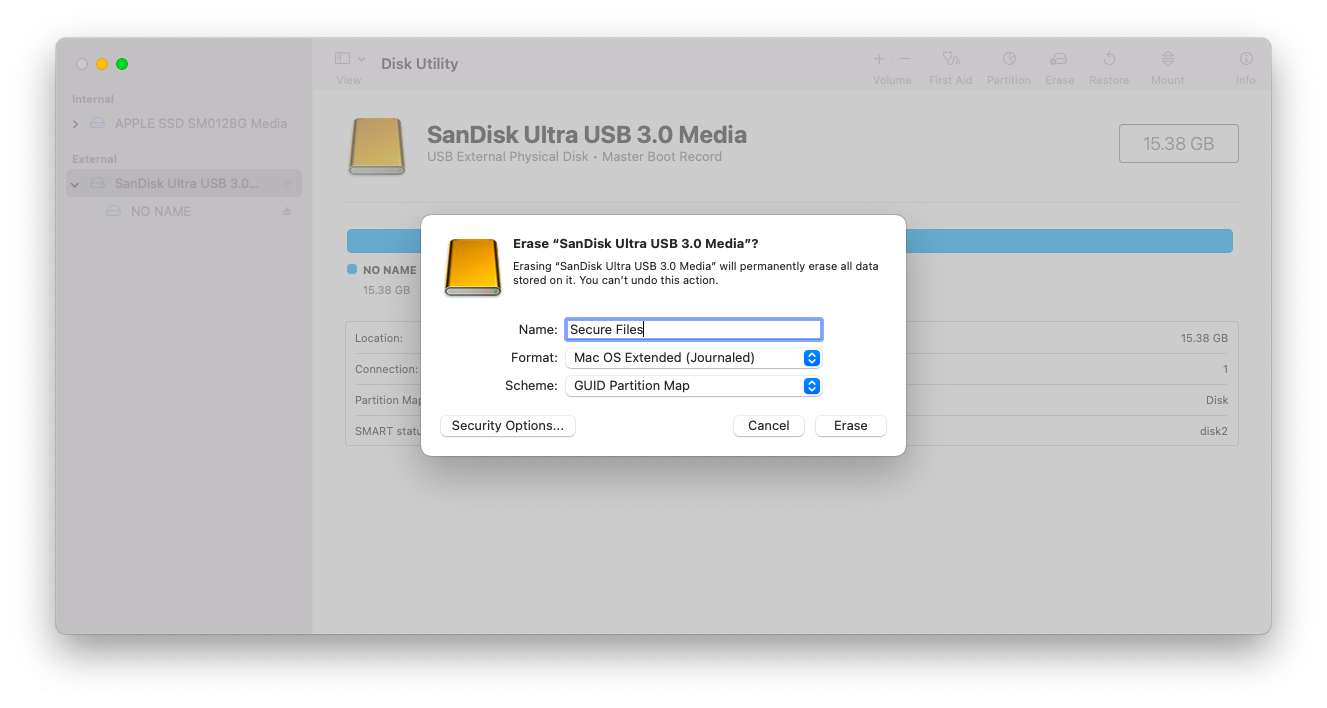
- Click the Erase button on top of the right pane to bring up the Erase USB dialog. You have Name, Format, and Scheme
- Type in the USB flash drive name. Try to choose the one you can easily recognise.
- Click the Scheme drop-down menu and select GUID Partition Map.
- Click the Format drop-down menu and select Mac OS Extended (Journaled). This enables you to open the encrypted drive on Macs with older macOS.
- Click Erase. Wait for the process to complete. If it’s successful, the drive icon disappears and remounts. It’s normal; don’t panic.

Encrypting a USB Drive
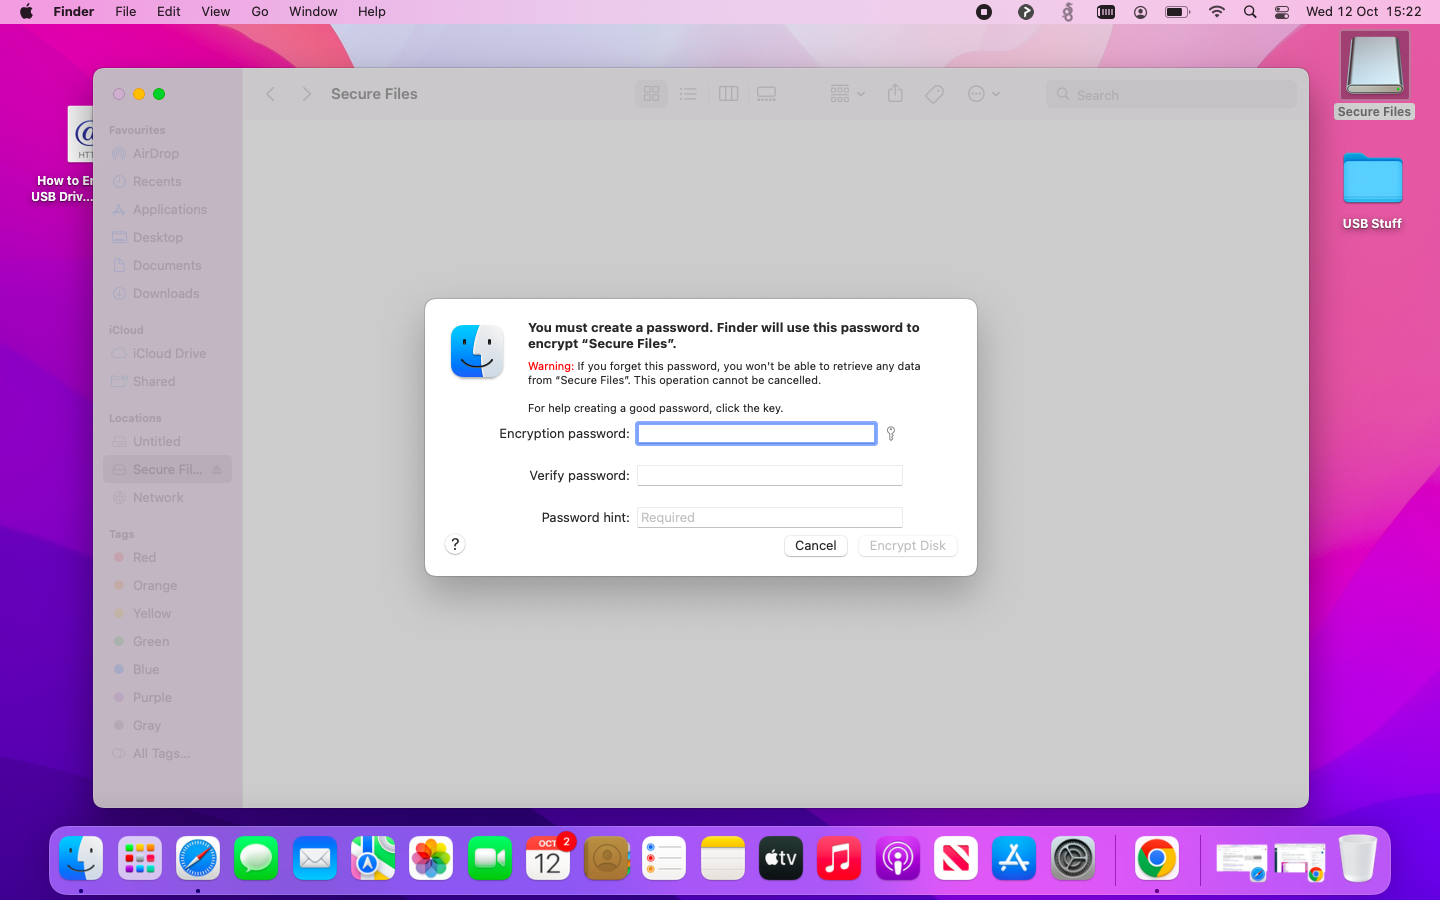
- Open Finder and locate the USB drive icon in a Finder window, or in the Finder sidebar
- Right-click (or Ctrl-click) it and select Encrypt “[USB drive name]“… from the contextual menu
- Create a password as prompted by Finder
- Verify the password and add a hint if you feel you’ll need it to remember the combination
- Click Encrypt Disk. Wait for the process to complete. If it’s successful, the drive icon disappears and remounts Done!
You now have an encrypted USB drive!
Best practice
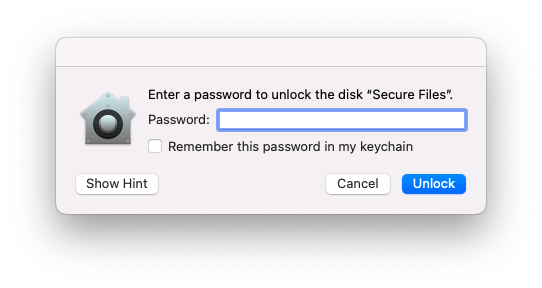
Unmount, re-mount and test the password before putting files on it.
You can work with it in Finder like with a common USB drive: copy, open, delete files – they are encrypted on-the-fly! Of course you have to type in your password every time you physically detach the drive or re-attach it to the Mac. So, if you forget the string of symbols, you’ll lose the access to the encrypted data forever, or have to pay for expensive forensics.
Pro Tip - Take a note of the password and keep it somewhere safe (on a piece of paper, you will of course need to remember where the paper is, alternatively use a password manager).
Usually, macOS prompts you to remember your password in Keychain. If you don’t trust your memory, check the box and the system will switch to automatic access by default. You can also decrypt the USB drive.
Decrypting a USB Drive
- Plug in the encrypted USB drive.
- Open Finder and locate the USB drive icon in a Finder window, or in the Finder sidebar.
- Right-click (or Ctrl-click) it and select Decrypt “[USB drive name]“… from the contextual menu.
- Enter the password to confirm the decryption.
- Click Decrypt Disk.
References
Encrypt and protect a disk with a password using Disk Utility on Mac – Apple Support